Dessert
Chocolate Brownie
Rich, fudgy chocolate brownies made with melted dark chocolate for an intense flavour and gooey texture. Perfect for dessert or an indulgent treat. Easy to make and sure to impress!

Unveiling the Secret Chocolate Brownie Recipe: Sweet Memories of every Occasion
Hello sweet-toothed adventurers! ? Today we're diving into a request from my lovely friends. It's my delicious Chocolate Brownie Recipe that's guaranteed to create a universe of sweet memories with every bite! From flirty dinner parties to cozy family gatherings, these little squares of happiness have been a favourite. Wondering why I've never shared it before? To be honest, I was keeping it just between me and my oven. But my friends have been so relentless (and I love them for it!), so here we are. You're just a series of simple steps away from making your own batch of these delightful chocolate brownies. So, don your apron, get your mixing bowls ready, and let's whisk up some chocolaty goodness! ?
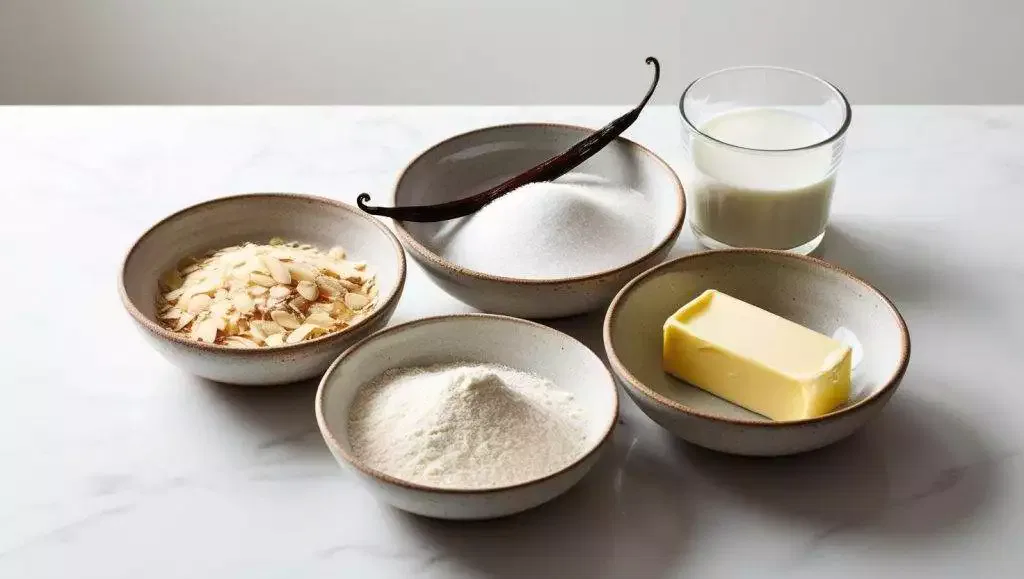
Ingredients
The magic of every chocolate brownie lies within the right ingredients and their perfect balance. Herein, I am thrilled to share the secret combination which will take your brownie game to a whole new level!
Butter and Its Role
Room Temperature Butter
The key to fluffy and moist brownies is the use of room temperature butter. At room temperature, the butter incorporates better with the dry ingredients, making a more homogeneous and airy mixture that results in a fluffier brownie. A well-incorporated batter also improves the overall taste of your brownies.
Melting Process
The melting process is crucial in our recipe. The butter should be melted in a deep pan, and this liquefied butter acts as the glue that holds all our ingredients together. Moreover, it provides richness, moisture, and a delightful layer of flavour to the brownies.
The Magic of Cocoa and Chocolate
Dark Chocolate Bits
The real star of any brownie is the chocolate. I usually opt for dark chocolate bits, adding them to the mixture adds a burst of rich chocolate flavour and texture to the brownies. This makes the brownie gooey on the inside, a characteristic every brownie lover cherishes!
Using Cocoa Powder
Apart from the dark chocolate bits, the cocoa powder adds a strong, bold chocolate flavour. Being a core ingredient, cocoa produces a deeper chocolate taste, which when combined with the melted butter, blooms and enhances its richness, transcending our simple brownie into divine chunk of happiness.
Eggs and Their Binding Power
Whisking Technique
The whisking technique is critical in adding air and volume to the mixture. Each egg should be whisked into the mixture one at a time to maintain an evenly smooth mixture. This process adds a certain levity to the brownies.
Ensuring Smoothness
The secret to a perfect brownie is providing a smooth texture. Carefully whisked eggs contribute significantly to ensuring smoothness and uniformity in the chocolate brownie batter.
Sweetness and Flavors
Caster and Brown Sugar
The mixture of caster and brown sugar is what gives our brownies the ideal level of sweetness with a slight hint of caramel, while also contributing to the ultimate moist texture, making each bite melt smoothly in your mouth.
Vanilla Bean Paste or Essence Vanilla bean paste or essence is a sublime additive which imparts an exquisite aroma to our brownies. This secret flavor complements and rounds the chocolate flavor, enhancing the overall brownie experience.
The Importance of Leavening Agents
Role of Baking Powder
The baking powder in the mixture gives the necessary lift to the brownies, making each piece perfect in its own little way. This leavening agent is quintessential in achieving a slightly crunchy top with a soft and moist interior.
Optional Ingredients for Variation
M&Ms for Playfulness
Who doesn't love to play with colours? Adding M&Ms to your brownie mix could not only make it more fun but also elevate the taste by adding a delightful crunch amidst the soft and fudgy brownie.
Pinch of Salt for Balance
A pinch of salt might seem insignificant, but in the world of baking, it plays a crucial role. It enhances the chocolate flavour, heightens the sweetness, and leaves you with a perfectly balanced bite of heavenly brownie.
Stay tuned! In the next section, you'll be directed towards the step-by-step process of baking these incredible brownies.
Step-by-Step Brownie Baking Process
When creating the perfect chocolate brownie, it's not just about the ingredients used: it's about the techniques we apply in combining them and the patience we apply in the baking process itself. Let's walk through this process to ensure you get the best possible outcome.
Preparation of Ingredients
Measuring and Sifting
Before diving into the baking process, make sure you carefully measure all your ingredients. For instance, in our chocolate brownie recipe, you'll need 130 grams of butter, at room temperature; not a gram more or less. The same rule applies for the flour, cocoa powder, sugars, and baking powder. Sifting the dry ingredients, such as the cocoa powder and flour, not only ensures accuracy in measurement but also offers a smoother, lighter texture to the final product.
Combining the Ingredients
Mixing Method
Now, onto the fun part. Start by combining your sugars, cocoa powder, vanilla bean paste, and baking powder. These ingredients get a bath in your melted butter, making for a delectably smooth start to this sweet treat. This mixture is then removed from the heat to cool slightly.
Key Mixing Techniques
As the mixture cools, quickly whisk in the eggs, one at a time. The key here is the blend each thoroughly before adding the next to ensure a truly smooth batter. Following this, slowly add your sifted flour mixture, folding it through the rich, chocolaty concoction in the pan. And, when you think it couldn't get any better, toss in the chocolate bits.
Baking the Brownie
Preheating the Oven
Set your oven to preheat at 170°. While you're waiting for it to warm up, go ahead and grease your square baking tin, then pour the completed brownie batter in.
Baking Time and Indicators
Once the oven hits the appropriate temperature, slide the tin into the oven for 30 minutes. The key in baking is trusting the process. Even if your brownie looks a bit soft when you pull it from the oven, don't despair. It will firm up as it cools.
Cooling and Cutting Tips
Optimal Cooling Time
Before you rush to cut into your decadent creation, give it time to cool in the tin, normally between 10 to 15 minutes. This cooling time helps ensure your brownie becomes solid and thus, much easier to cut into.
Cutting Techniques for Clean Slices
Once cooled, use a sharp, thin-bladed knife to cut clean slices of the brownie. Making slight sawing actions, rather than pressing down, will give you those clean, perfect squares of chocolate scrumptious.
You now have all the knowledge at your fingertips to master our chocolate brownie recipe. Enjoy the process and savour every bite of your home-made chocolate brownies!
Chocolate Brownie FAQ
Our treasured Secret Chocolate Brownie recipe can often lead to some questions. Here, we address some of the most commonly asked questions by our dear baking enthusiasts.
Can I Substitute Ingredients?
Indeed, baking is an art, and sometimes you may wish to experiment or deal with an ingredient you don't have on hand.
Alternative Sugars
While the secret recipe calls for mixtures of both caster and brown sugar, they can be substituted. You can replace caster sugar with granulated sugar. However, bear in mind that caster sugar is finer and dissolves more readily, giving a smoother consistency to your brownies. As for brown sugar, the molasses in it contributes a unique flavor and moisture. If need be, you can use purely white sugar, but you might miss out on that extra moistness.
Different Types of Chocolate Bits
The recipe requires dark chocolate bits. If you don't have those or want a different tinge to your brownies, you can use other types of chocolate bits like white chocolate or even milk chocolate. But remember, each type of chocolate contributes its own unique taste, and darker chocolates tend to offer a richer flavor.
How Do I Store Chocolate Brownies?
Storing these divine treats properly is important to maintain their freshness and savor their rich taste for a longer time.
Optimal Storage Conditions
Store your brownies in an air-tight container at room temperature. Avoid the fridge as it can dry out your brownies. If your living environment is hot, a cool pantry or leftovers could be stored in the fridge, but make sure to warm it up in the microwave before eating to regain the fresh-baked taste and soft texture.
Shelf Life
When stored properly, these chocolate brownies can last up to 3-4 days at room temperature. If refrigerated, they can last for up to a week.
Why Is My Brownie Too Soft or Hard?
Getting the perfect texture for your brownie can sometimes be a bit tricky, but don’t worry—we’ve got your back.
Factors Affecting Texture
Several factors contribute to the final texture of a brownie. First, is the ratio of fat (butter and chocolate) to flour. More fat results in a fudgier texture, while more flour makes for a cakier brownie. Second, the time spent in the oven can either make or break your brownie. Overbaking leads to a hard, dry brownie while underbaking might leave you with a too-soft, undercooked treat.
Adjustments to Consider
If your brownie is too hard, it might be overbaked. Try reducing the baking time or lowering the oven temperature slightly. If your brownie is too soft, it might be underbaked. Leave it in the oven a bit longer or make sure the temperature is accurate. Don't forget, the brownie continues to cook a bit more once out of the oven and cooling in the baking tin!
We hope these answers help you to perfect your Secret Chocolate Brownie recipe. Enjoy the process and don't forget to savor every bite of your homemade delight! Happy baking!
Easy Recipe
Chocolate Brownie
Rich, fudgy chocolate brownies made with melted dark chocolate for an intense flavour and gooey texture. Perfect for dessert or an indulgent treat. Easy to make and sure to impress!
Ingredients
- 130 g butter (room temperature)
- 2 eggs
- 1 cup plain flour
- ½ cup cocoa powder
- ½ cup caster sugar
- ½ cup brown sugar
- 1 cup dark chocolate bits
- 1 pinch salt
- 1 tsp vanilla bean paste or vanilla essence
- 1 tsp baking powder
Instructions
- Preheat the oven at 170° and melt the butter in a deep pan
- Mix sugar, cocoa powder, vanilla been paste and baking powder, and pour the mixture in to the pan, mix till they’re all well combined;
- Quickly remove the pan from the heat, let it cool down for a bit, around half minute;
- Very quickly, whisk egg into the mixture, one at a time, until the mixture is really smooth;
- Combine flour and baking powder, then sift the flour mixture and fold it through to the mixture in the pan;
- Add choc bits, I normally use 1 cup but you can change the amount accordingly or use M&M instead to make it more playful;
- Grease the square tin and pour the mixture into the tin;
- Put it in the oven for 30 minutes. Do not worry if the brownie looks a bit soft, when you take it out of the oven. Just let it cool in the tin for 10 -15 minutes, as it will become solid and therefore easier to cut.
Notes
-
The use of melted dark chocolate contributes to a higher saturated fat content compared to recipes using cocoa powder.
-
The recipe's sugar content is relatively high; consider adjusting the sugar quantity to suit dietary preferences.
-
For a healthier alternative, you might explore recipes that incorporate ingredients like oat flour, unsweetened cocoa powder, and natural sweeteners, which can lower calorie and fat content while adding nutritional value .
More recipes
Keep cooking

Shop


Comments
Join the conversation
Thoughts, swaps, and serving ideas are welcome.